


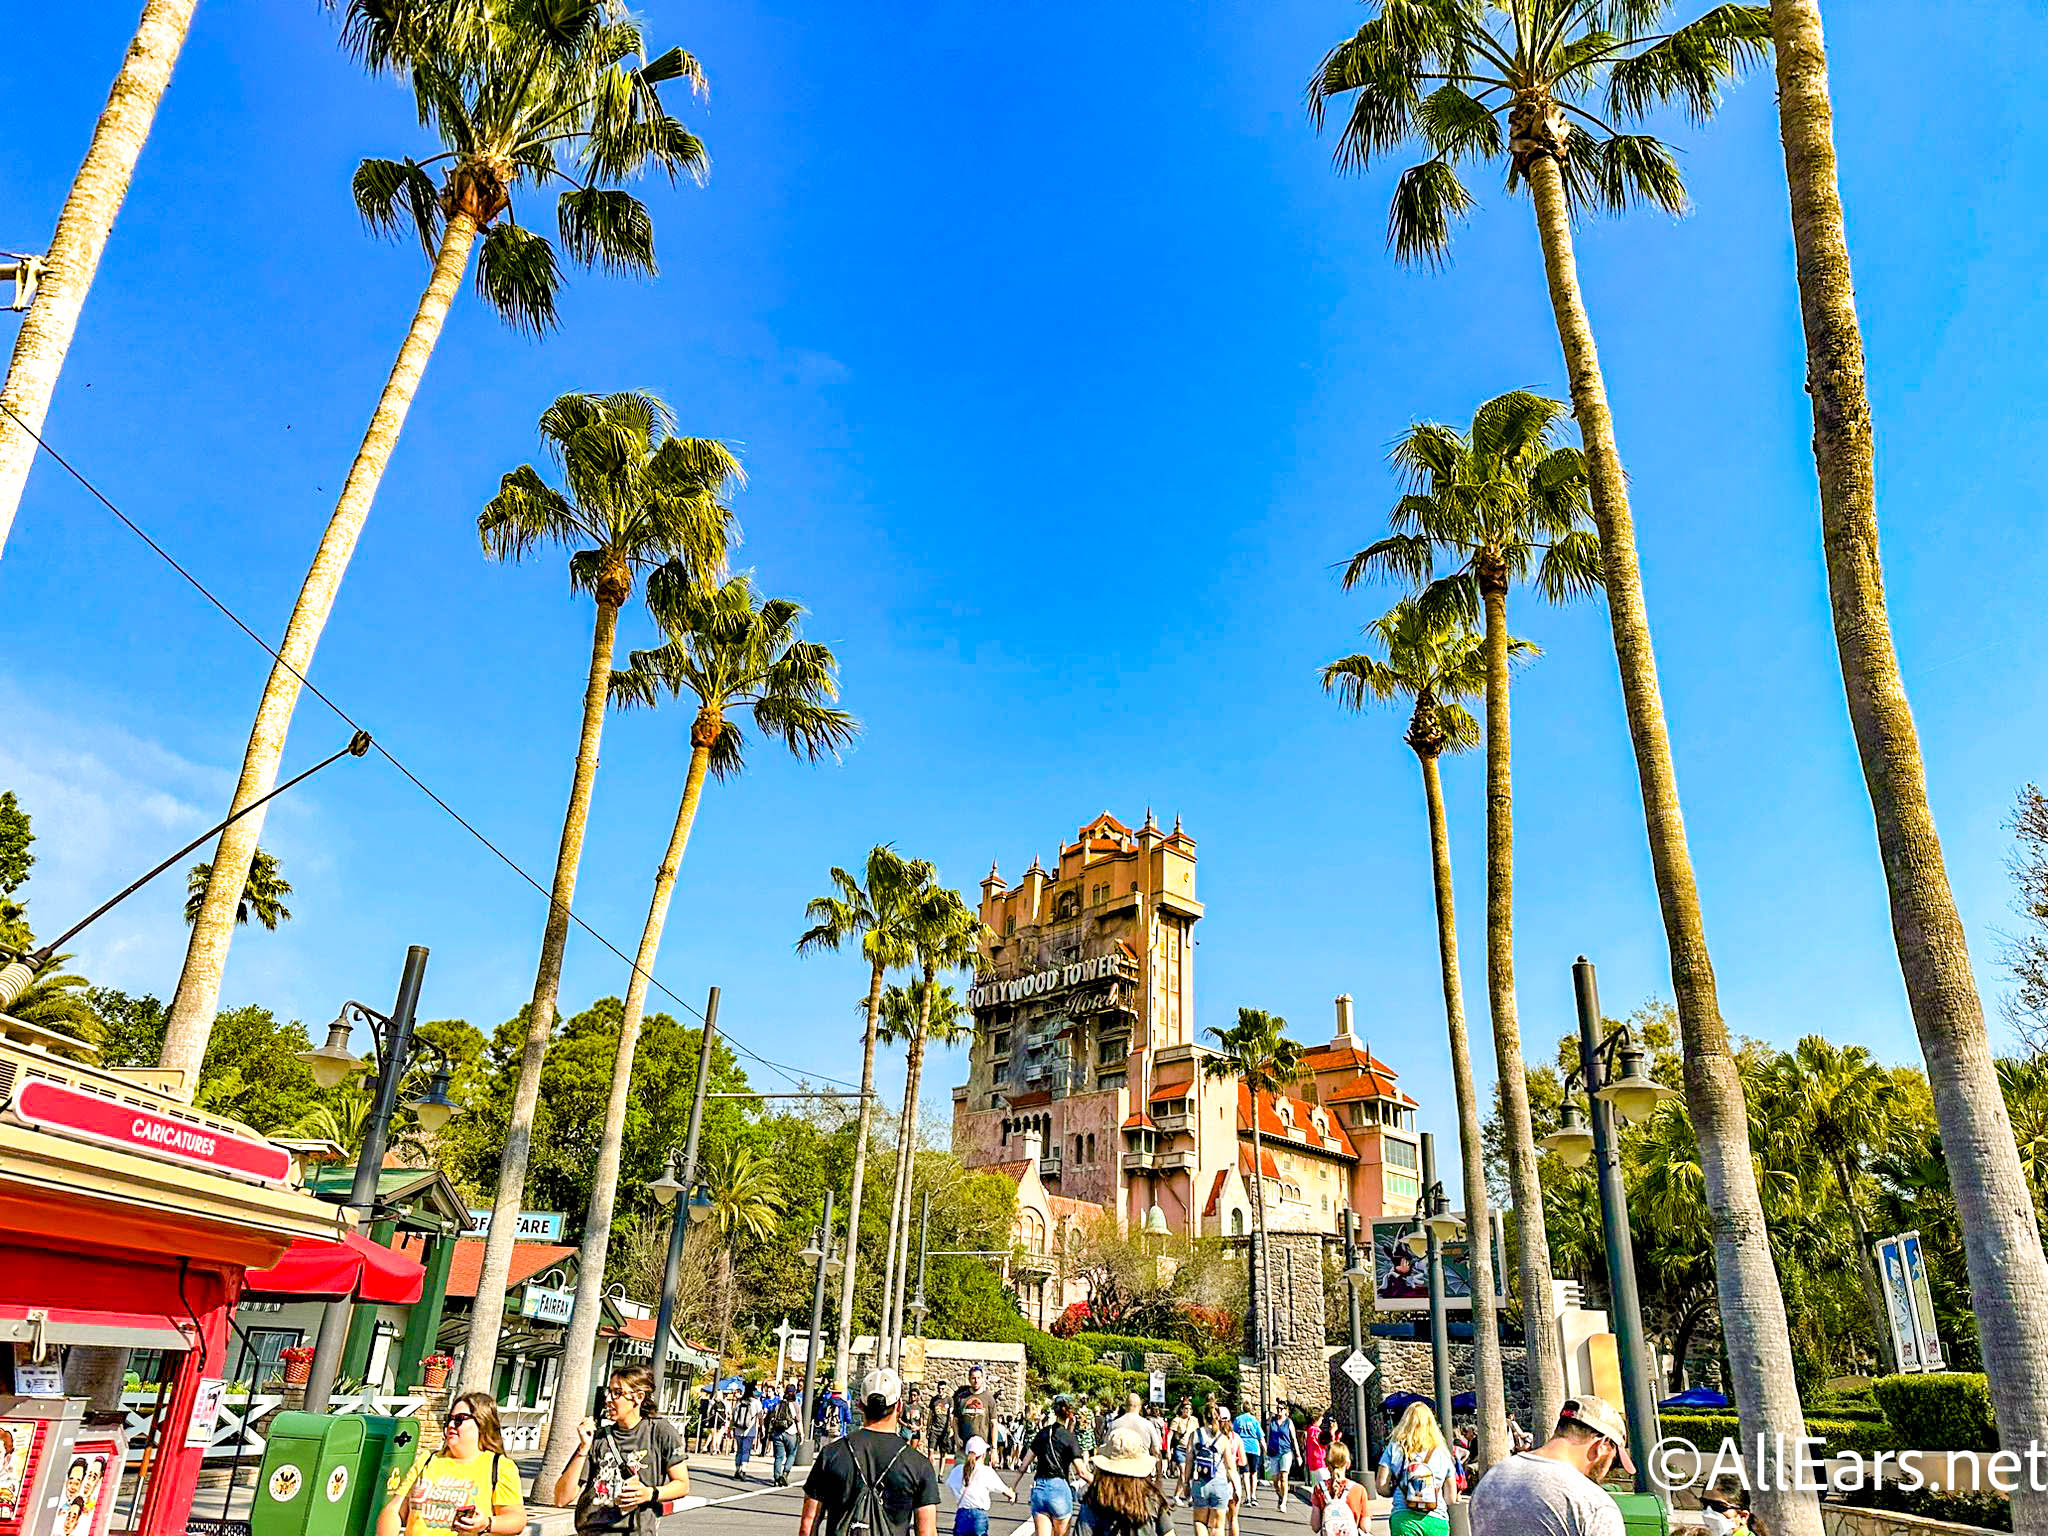
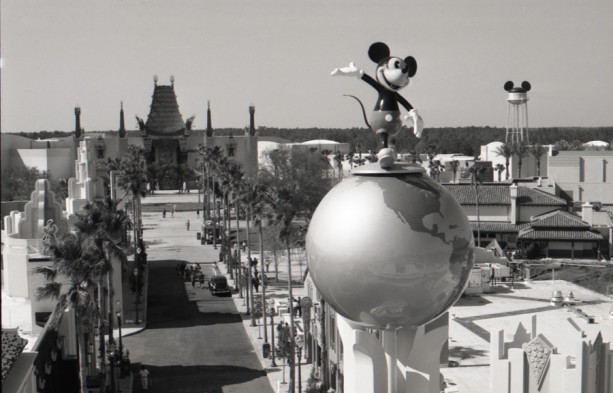
Hollywood Studios Entrance.
Nikon D70/18-200VR, 30s, f/16, ISO 200, +0.3 EV, 170mm Focal length, Tripod
I have never carried a tripod into a Walt Disney World park until my last trip. I thought it would be too much trouble and a bother. However, if you plan ahead, it can be done without too much disruption to your family’s enjoyment. First, you have to consider how to carry the tripod the times you decide to bring one. For me it started with the choice of tripod. I didn’t want one too heavy or big and easy to carry. I settled on a Manfrotto 725B Digi Tripod with Integrated Ball Head and Carrying Bag which is all those things and cost about $135. This tripod has since been replaced by the Manfrotto 7302YB M-Y Tripod and still comes with a ball head and carrying bag at around the same price. The carrying bag allowed me to carry the tripod over my shoulder comfortably. Now, don’t get me wrong, I would not carry the tripod all day long. The main reason for using a tripod at Walt Disney World is for long exposure photography in the early mornings, evenings and fireworks.

On the days I planned to use a tripod, I would rent a locker at the parks. The tripod fit easily in a LARGE locker (see photo) so make sure you ask for one of this size. It was also handy to store sweatshirts or sweaters if you are visiting when the nights cool down. This let me go on rides and attractions without having to deal with the bulkiness of a tripod. The lockers are located near the front entrances to the parks so be aware of how long it will take to retrieve the tripod. I tried to plan to be near the front of the park about an hour before sunset. That gave me more than enough time to get to the locations I had in mind.
So, what are the advantages of a tripod besides being able to shoot at long exposures. It lets you use low ISO setting which means less noise and better clarity to your photos. All of my tripod photos were taken at my camera’s lowest ISO setting of 200. Tripods, used correctly, give your camera a rock steady platform with no shake. To insure as little or no camera movement as possible use a remote shutter release or your camera’s self-timer. Some people even go so far as locking up the mirror (see your camera’s manual on how to do this).

Temple of Heaven in the China pavilion at dusk.
Nikon D70/18-200VR, 8s, f/8, ISO 200, +0.3 EV, 18mm Focal length, Tripod
I keep mentioning how I planned to use a tripod and to be at a certain place. Think of it as an extension of your normal planning process and make sure your family is involved so they know what you want to do and expect. For fireworks, your family will probably want to be with you. Other times, they may want to explore while you are waiting through 10, 20, 30 second or longer exposures. It pays to research locations. In previous visits, I would try and take a night photo which just wouldn’t work hand-held so I would make a mental note. flickr is a great place to find locations as there are many photographers who specialize in Disney themepark photography.
Sometimes you might just come upon them as you walk around. On a previous trip, I walked the trail between Disney’s Hollywood Studios and the Epcot resort area late at night. I looked over the canal to the Twilight Zone Tower of Terror all lit up in very moody colors fitting the theme of the ride and knew I would need to come back with a tripod which I finally did.

Twilight Zone Tower of Terror at night from the walking trail to the Epcot resort area.
Nikon D70/18-200VR, 30s, f/11, ISO 200, +0.3 EV, 130mm Focal length, Tripod
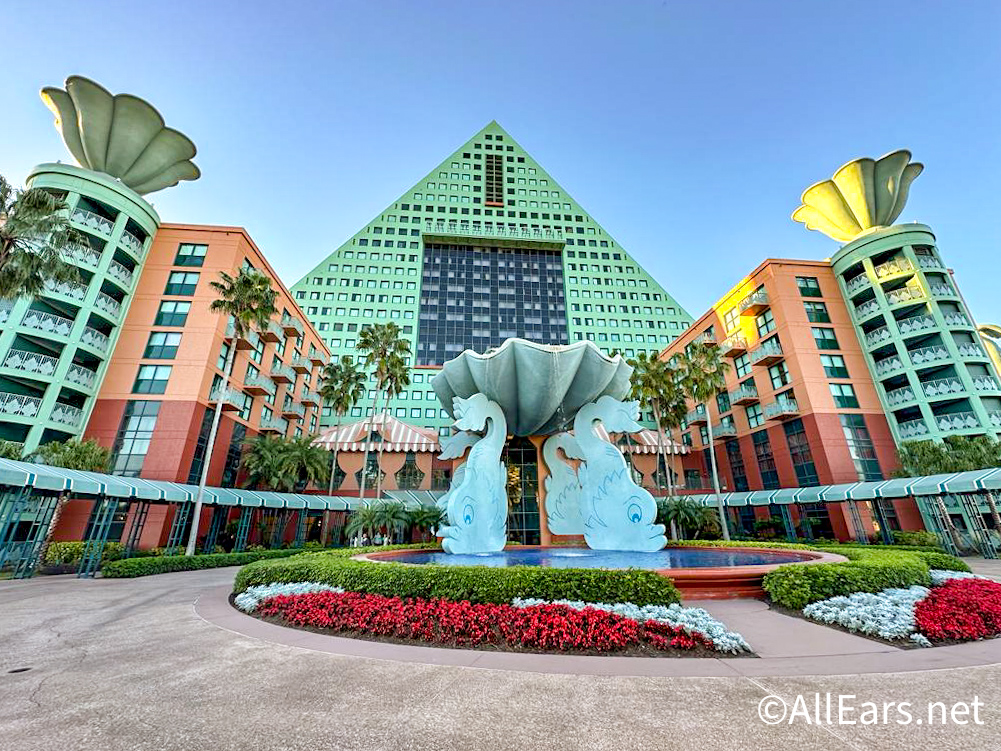
This was taken late at night which is another way to capture unique night time photos at Walt Disney World when the parks are close to being empty of visitors and there’s a chance the water around and in the parks is calm. I had such a night during my last visit and was able to get mirrored images around the Epcot resort area like in this photo of the Swan Resort.

The Swan Resort mirrored in the canal the Friendship boats use during the day.
Nikon D70/18-200VR, 30s, f/11, ISO 200, +0.3 EV, 18mm Focal length, Tripod
Using a tripod at Walt Disney World does take some effort and advanced planning but the rewards of capturing photos you could never get without one is worth it. Will I always take a tripod to a Disney park now? That will depend on what I have planned and who will be accompanying me but I will never think of it as a burden. Tripods open up far more opportunities when the Sun goes down.
Check out our Camera Section of the AllEars Amazon.com Store!
Camera and Lens
Accessories
Photo Books and Magazines


This page has been dead for a while but I still found it useful! Looking for a cheap travel tripod with some equivalence to yours, Scott. 🙂
Scott replies: Comments to these posts are not usually very active but the information is still very relevant for today’s Disney photographers who are looking for information on what to expect when using a tripod at WDW.
Me again. I have a gorilla pod, does this work with the above scenarios?
Scott replies: Make sure the gorilla pod you have can be used with your new camera and the lens you have. Some of the earlier models weren’t designed for dSLR cameras. New gorrillapod models can handle the weight of a dSLR and zoom lenses.
I am staying at the Swan Hotel this coming November & was thrilled to see the photo of the hotel. I usually only stay at Disney owned hotels. Since this is a spur of the moment (I am planner, so this is spur of the moment for me)I am staying here.
Anyway, I noted the lens info & wondered if the same f/stops & ISO’s are same for all brands of camera. I own an Olympus SLR. I gave my point & shoot digital to my niece. I hope I don’t regret giving it up.
Scott replies: The exposure (f/stop and shutter speed) may change depending on the lighting conditions you encounter. With a tripod, set your ISO to the lowest possible for your camera and then use your camera’s light meter to find the correct exposure. Search the Picture This! blog for “exposure” to read other articles on how to do this.
Nice!! I really appreciate you AllEars photographers sharing your pics and advice. Sometimes I set the camera down and forget about it as life gets busy but seeing your Disney photos gets me excited about it all over again. Can’t wait to get back and try some stuff out.
Scott replies: Josh…Barrie, Lisa and I thank you very much for your comments. They keep us juiced to keep doing it!
Great pictures. Thanks for sharing I was looking for a good tipad to take to WDW, but was afaid of putting my camera on a 29.99 travel tripod.
Scott replies: Tony, I have used the Nikon 70-200VR f/2.8 lens, which is a very heavy lens, on this without a problem. I like that it comes with a ball head and quick release plate.
I had a hard time finding it. You might have better luck finding the replacement tripod at B&H and other Internet stores.
Wow! These photos are amazing! There’s something extra special about Disney at night!
Scott replies: Thank you, Tracy! Yes, Disney transforms at night with even more magic.